-
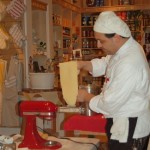
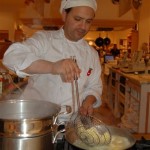
Williams- Sonoma homemade ravioli demonstration, using the KitchenAid mixer and its pasta attachments.
This is a continuation of a post made on Aug. 12th.
- In this post we will go over the rolling out of the dough procedures along with using the KitchenAid and its pasta roller and ravioli making attachments.
- The pasta dough recipe for making the ravioli is provided on last weeks post.
- The link provided here, will take you to the post and pasta dough recipe. > http://ow.ly/66GpL
- Once you have made the dough and have let it rest according to the instructions from the recipe, you can begin to roll and stretch the dough with the machine.
Cut the dough into fourths. This will allow one to have better control over the dough while rolling out and stretching the pasta dough. Flatten the dough with the palm of your hand to press it to about the same thickness at the largest opening on the roller attachment.
Run the pasta through the rollers at its most open setting several times folding the dough into thirds and passing it through again to build some strength to the dough and get it ready for stretching.
The Roller attachment on these machines works extremely well.
They are automatic, which enables you to be able to use both hands while feeding the dough through the rollers.
- Once you have passed the dough through the largest setting a few times folding into thirds after each pass, you may now begin to tighten the setting. Closing the rollers one notch after every pass, until you have reached the number 6 setting on the dial.
-
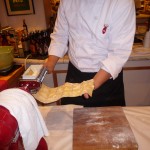
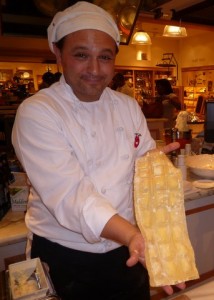
A beautiful pasta ribbon of pasta will develop!
- If is is somewhat sticky one can use a very small amount of flour or semolina to alleviate the stickiness to allow for easier handling of the dough as it increases in size.
- The key here is: If the proportions were measured out correctly with the recipe provided the dough should be extremely workable with little need of any additional flour. (Use trace amounts if more flour and semolina are needed)
The machine rolls a beautiful pasta ribbon with no problem!
The best part is the attachment roll the exact width of pasta dough to match the exact width of the ravioli attachment which is the next step.
This allows for no trimming , and allows for a quick transition to the actual making of the ravioli.
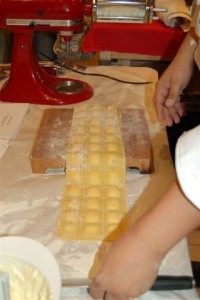
The roller is easily removed once the final stretch is achieved, and replaced with the KitchenAid ravioli making attachment.
The ravioli attachment once in place, and the pasta ribbon has been slightly fed through can easily be filled with the ricotta cheese.
The attachment comes with an exact portion sized spoon, to allow one not to over fill the pasta.
This also keeps the messy part to a minimal.
This attachment is not automatic; it is a hand crank.
This enables you to go nice and slow and create perfect and professional looking ravioli.
Once the ravioli are formed, let the pasta sit for 15-20 min to dry slightly, then pull the ravioli carefully apart from one another .
If the dough is still to moist to pull them apart nicely, simply use a pastry or pizza wheel, or a small knife and carefully cut them apart.
*Keep attentive as to not puncture or tear any while cutting and separating the ravioli.
*Hint: The ravioli can be stored and reserved up to 3 days once slightly dried and separated. Place them on a parchment lined tray sprinkled with a little semolina and flour. Wrap well with plastic wrap and place in refrigeration.
Also, these ravioli freeze nicely up to 2 weeks.
If using immediately cook the pasta for 2-4 minutes in boiling , salted water. Do not cook longer! This is fresh pasta and cooks rapidly.
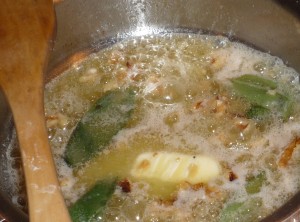
While the pasta is cooking heat a saute pan. Once the pan is hot add two sticks of unsalted butter, along with 3-4 fresh sage leaves.
Once butter has melted, and begins to froth, quickly add the pasta to the pan, along with a some of the pasta water.
We don’t want just a melted butter sauce!
*This is the tricky part…we want to emulsify the hot butter with the pasta water and toss the ravioli quickly with all the ingredients to create a emulsified sauce.
Once the pasta has been added to the saute pan with some of the pasta water, toss and swirl pasta a few times to incorporate the emulsification fully.
The pasta water will help to emulsify the butter and create a nice sauce. Once a sauce like consistency is reached, season to taste.
(If your ravioli were made correctly, there should be no worry of them breaking at this stage.)
Carefully place the ravioli into a serving bowl. Sprinkle with some Parmesan cheese, and garnish with some toasted pine nuts.
The pasta should be eaten immediately. Delicious!!
This was a well received KitchenAid pasta demo, and I want to thank all those that came out to Williams-Sonoma and added to the fun!
The ricotta cheese recipe will be posted shortly…Stay Tuned!
